STÉPHANIE AND CHARLES E.
MATERIAL: HARDWOOD, OAK MILRUN TENZO 3 1⁄4
QUANTITY: 1,100 FT2
Very nice experience overall. We rented the right equipment with advice from the consultant who helped us choose the proper flooring for our common areas. We followed his instructions, as well as watching various Youtube installation videos. We estimated that our savings in tearing and installing the floors were around $4,400. It was good to get in some exercise during the COVID pandemic. Thank you for your great advice and all your help.
JONATHAN AND ANNABELLE T.
MATERIAL: 8MM VINYL 2982 WITH MEMBRANE,
QUANTITY: 700 SQ. FT.
Much easier than expected! We removed the floors from the boxes two days before installation. We installed the first row the day before over a bottle of wine. It took a little longer than what we expected to get the flooring aligned with the walls as walls apparently are not often straight. The next day, we started at 7 am and we finished before noon. The delays to get an installer were too long so we’re glad we did it ourselves.
ZACK AND MARILYNE C.
MATERIAL: HICKORY NATURAL ENGINEERED FLOORING 7 INCHES 5/8
QUANTITY: 1,200 SQ. FT.
We decided to nail our floors, as advised, on already existing plywood. The purchase of the Bostitch 1838 (tool specialized for engineered flooring) made the job very easy. The planks were easy to fit together with the help of the nailing gun. It was a pleasure to do, really. Like a giant puzzle. We took our time and did it in 3 days. Beautiful to see the finishing product.
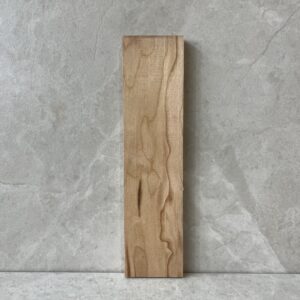
NATHALIE AND MICHEL T.
MATERIAL: MAPLE HARDWOOD 4 1⁄4, COLONIAL, NATURAL
QUANTITY: 800 SQ. FT.
Glue! Glue! Glue! A reminder that all installations need a tube of type PL glue for when floors meet the wall because of how you may need to cut some pieces for them to fit. Simply glue the last 2-3 rows of flooring onto the edge of the wall. We also had to use glue when changing directions as we approached different rooms. Save yourself time and buy 2-3 tubes of PL type glue for your installations right away as you’ll probably need it. All installations will end up needing it for the ends of the rows and the few times you’ll need to change directions.. Glue is 100% necessary for hardwood installations right on the edges of the walls. The rest can be accomplished by nails quite easily. This was our 3rd floor installation and we did it in 1.5 working days. We’re pretty proud.
JACINTHE M.
MATERIAL: FLOATING FLOOR 12.4 MM AC4 TF6002
QUANTITY: 500 FT2
The membrane is easily laid on the ground, without fasteners, in 4 feet wide slices, with adhesive tape on top to stick one plank on top of the other. The floor is simply clicked on, easily enough. I left half an inch on the edge of the wall in case of any expansion. The moldings we used were 5/8, so it covered this gap without trouble. Youtube has some very helpful videos that you can watch and we’re glad we followed them.
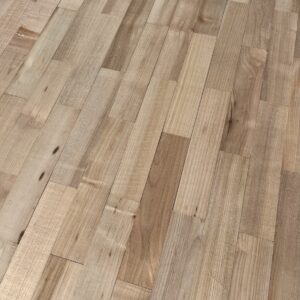
DYLAN AND MARJORIE V.
MATERIAL: ENGINEERED MAPLE 5 INCHES ½ NATURAL GLUE ON HEATED SLAB
QUANTITY: 1,000 FT2
We got some back pain, lost 5 pounds, got glue on our hands but still, it was a great experience! We were advised to glue our floors with the Sikka T-100. It was excellent advice because it really did the trick, even though it wasn’t easiest glue to find. We lined up our first row the day before we started the installation. Our room is rectangular and we finished it in 3 days. Without even realizing it, we had glue on our knees and made some stains here and there which we noticed after cleaning when looking under certain reflections of light. But thanks to the quality of the varnish on our floors that were made in Québec, we were able to remove the glue using a 3M Adhesive Remover. The level with our kitchen ceramic is slightly different but we finished it off with a discreet brushed aluminum moulding so you can’t even tell!
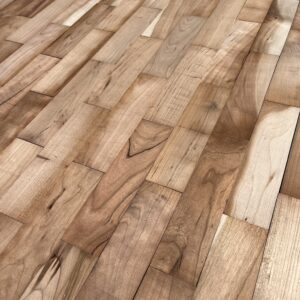
CEDRIC P.
MATERIAL: HARDWOOD WALNUT 3 ¼ NATURAL MATTE,
QUANTITY: 600 SQ. FT.
It was a real challenge because I had my ceramics on the right of the room and my stairs going to the garage on the bottom left. It took me some time to get the hang of it because I didn’t know where to start. There was a slight margin on error both ends but it still made for a perfect finish. My decision was to start on the side of the ceramics and work my way towards the stairs. When I got to the stairs, instead of hoping that the wood fit perfectly, I bought a 5 inch transition molding, which I installed and finished on site. The fact that the molding was wider allowed me to finish at 3 ¾ on the edge of the stairs which seems less when using another 3 ¼ plank and then a ½ inch molding. I did two coats by hand, sanded between coats with 220 sandpaper, and now you can’t see the difference at all, unless you crawl on all fours with a magnifying glass! All-in-all, I’m very happy with how it came out.
MANON AND GEORGE C.
MATERIAL : VINYL 6MM SUPERMAN FLOORING WITH MEMBRANE 7002 CLICK
QUANTITY: 1200 FT2
Incredibly beautiful product that we installed on plywood. I’m glad we decided to do it. It was fun at first and we got more confident as we progressed. It was very nice to see the project come to life. I was good exercise, we saved a bundle, and it gave us something to do with our time. A little advice: don’t trust your walls to be straight, they often are not.